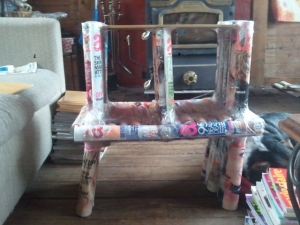
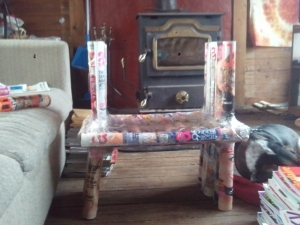
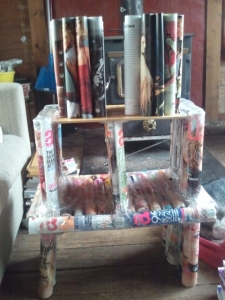
After a few minor disasters and my dog nearly being crushed by a falling pile of magazines, the cabinet is now two shelves high and the dog is starting to trust that he can safely enjoy his beanbag again! My creation looks like a two level shelf and stands about 24″ high. I used 18 more magazines adding the second shelf and it really could be used just like this as a small shelf, if I didn’t want to see how far I could take this. It is fairly stable, with the exception of one leg that insists on sitting at an angle, no matter what I do. Since that leg isn’t falling off or keeping the cabinet/shelf structure from being as level as it can be (in a house with absolutely no level floors) I’m letting it stay put and live in peace. In the pictures, it looks slightly more crooked than it actually is, but the shelves do sit about as level as uneven paper rolls can.
I definitely had a different picture in my head when I started this than what my end result is going to be, but I am pretty happy with how this crazy project is turning out.
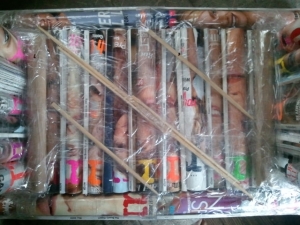
I was a little concerned that the tape might not stick as well as I hoped, so after letting the first shelf of the cabinet sit overnight to see how it held, I gave it a good shake to see how well it stayed together. I was pretty impressed! I worried about the weight of the shelf causing it to sag, so I reinforced it underneath the shelf with chopsticks and a little more tape. Just a little something to keep the magazine rolls from starting to buckle.
After I added the second set of side supports, I positioned an extra support row in the middle of the shelf to help balance the small pieces of wood that form the second shelf. I taped it all together and it forms a fairly stable unit. Even the dog is comfortable laying next to it!
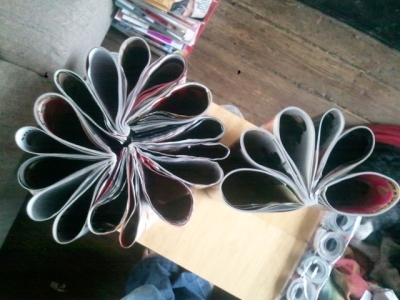
I started thinking about the weight that two more shelves would add if I built them in this same way and started considering alternatives. I remembered another project I had seen and pinned on Pinterest that fanned the magazines out into six sections and used them as structural supports. While I am fairly confident in the strength and stability of what I have built, I have to be realistic about what it can hold. I’m probably not going to be putting anything glass on it, but I think it will hold some of the random, lightweight, plastic kitchen stuff that so desperately needs a home.
Now I have to figure out how I want to place these fanned magazines under the next shelf. They could go around the edges with one serving as a cabinet door or as two pillars that support the next level, or…
No matter what I decide to do with the next level, it is going to be fun playing around and making the choice! I think the cabinet is looking pretty good for a pile of old magazines and a couple rolls of tape that were just taking up space before!
Sometimes, I wonder why I let myself start these crazy projects. Usually, that happens when I am at the point where the project has taken over the house and my life and even the dog is starting to fuss at me for spending too long staring at the things in front of me, trying to figure out how to make them do the things that I want them to do. The beautiful part is when it works out.
Partway through sorting the magazines, I realized that the color of the magazine headers was ultimately more important than the date of publication, so I started separating them by color and rolling them up into tubes. I have a small wall that I ultimately want to put this cabinet against, so it won’t be quite as big as I imagined in my head, but realizing that weight is a serious issue, that is probably a good thing.
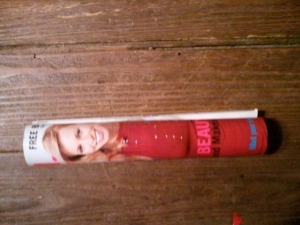
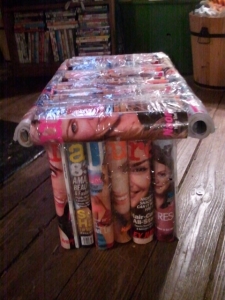
My basic building block - a magazine rolled into a tube and held together with a strip of clear packing tape
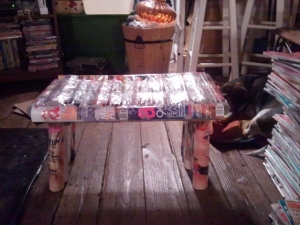
I rolled enough magazines to make a 24″x14″ shelf that stands on two 11″ wide legs. There was a lot of tape involved up to this point as well as two sturdy cardboard tubes (I think that they once held foil or plastic wrap) cut to brace the shelf against the legs. As I add more height, meaning more weight (magazines are HEAVY!) I may need to add another outer frame of magazines around the base to keep the legs from bowing.
At this point, it could be used as a low shelf for shoes by a door or a TV tray for kids or even a foot rest. I have used 32 magazines building the first shelf and it hasn’t collapsed on itself and can even support a bit of weight, too!
I think that the small wooden shelves I have will work better than magazines as the top level of the second tier to save weight and make the uppermost two shelves more stable, and I believe I have come up with a way to secure them that will work well, but I’m going to wait until tomorrow to find out.
I decided it would be easiest to sort the magazines by title and then by date, in an effort to keep things (somewhat) organized. I have found some interesting and timely gems, such as a Harper’s Bazaar from January 1996 that has Whitney Houston on the cover, Fortune from March 17, 2008 with Steve Jobs on the cover and, somewhere, in one of the boxes surrounding me, is the Harper’s Bazaar with Princess Diana on the cover.
I have seen a few other examples online of stools and tables made from magazines that are rolled up for stability and that seems like a reasonable idea. Even if their primary purpose was as art, they looked fairly sturdy. I also found one wall shelf made from old issues of National Geographic Magazine, where the magazines were soaked in a cornstarch and water solution and allowed to cure for a week or so, then cut like wood to make the shelf. I liked all of these ideas and I have pinned many of them on Pinterest ( http://pinterest.com/princesssachs/ ) if you want to check them out for inspiration or to see what it is that started me off on this whole crazy episode.
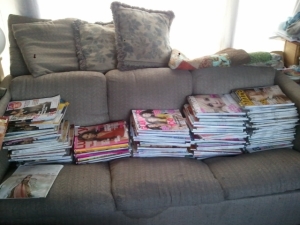
Halfway through the sorting process. There are plenty more where these came from and I just found another box of magazines hiding under a pile of fabric!
I think it will take quite a few magazines so I have had to tap into the upstairs stash after all and the sorting process is taking a while. I still haven’t decided if I want to paint the finished product, but in case I don’t, I think it would look visually appealing if I grouped each magazine together and then roll them up carefully so they still spell out the name of the magazine once they are placed in a row. I have an old aluminum pole that I have kept for years that I think will make an interesting central support for the shelves, an old bag of wooden chopsticks, some small rectangles of wood from an old shoe store display wall, and plenty of flat cardboard, cardboard tubes and various bits of plastic to act as joints and braces on the interior, to keep if from collapsing in on itself. Twine, duct tape and clear tape are the only other things I plan to use right now, but that could start changing on a second to second basis.
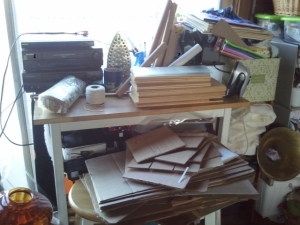
I collected everything I think I will need and put it on my work table so that I can find it once I get started. Obviously, I have a few different projects going on right now and everything needs more space!
I am far too impatient to wait a week for the magazines to cure with the cornstarch solution if I don’t have to, so I plan to start by rolling up enough magazines to build the base level of the shelf and then see how stable it is. My theory is that if the base is wide enough and I use enough magazine rolls on the sides as supports, I should be able to stabilize it with the center pole as it gets taller and narrower. I’m hoping it will support two shelves that I will make doors for and at least two shelves atop those that are narrower and also have doors. I haven’t figured out the doors yet, but I’m kicking around a few ideas that have potential.
Now, back to sorting so I can get onto the rolling and discover if my method for making the magazine rolls is going to work as well as I hope it will!
I have too much stuff. I am a collector of various things and I can always see the creative purpose in things that are otherwise useless. The problem is that because most of it means something to me or has some other value, I just can’t bring myself to get rid of it. Contemplating the piles of boxes around me, I came up with an idea that will either be amazing or a spectacular disaster.
A small house with a small kitchen and a lot of kitchen stuff have caused some overflow…well, a lot of overflow. China hutches are expensive to buy and take up space but I really need someplace to put all this stuff because I actually DO use most of it at various times. I started thinking about what I had that I could re-purpose or re-build to fill this need.
After wandering around my house for a bit, it occurred to me that I have boxes and stacks of magazines all over the place, just waiting for a purpose (collages, ideas, donating, anything that prevents me from having to haul them all to the dump) and causing me to trip over them. Some of them are worth saving (at least to me) but I have very little attachment remaining to most of them and although some of them date back to the late 90’s, I think it is time that they had a greater purpose than tripping me because they are in my way.
So, after looking for similar ideas and finding nothing that really fit my needs, I have decided to see what happens if I just jump in and start building (cue disaster music) and see if old magazines can become kitchen storage.
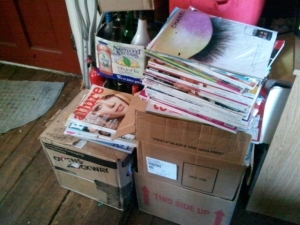
This is one of the smaller stacks of magazines and my starting point (the rest are upstairs and dragging them down the spiral staircase is not going to be fun). The bottles behind the magazines are for a different garden project, but who knows what I might need to make this experiment structurally sound? Rounded glass corners could be pretty…
Time to start sorting the magazines and start thinking about how to tweak my original idea into something that works, then I get to wander around the house some more and compile a full list of supplies I intend to use and take more pictures of this disaster in progress. It may not end up strong enough to use as a china hutch, but I think it is going to work and even if it doesn’t, I am already having fun!

